Monday, April 30, 2012

Seared Scallops

A few weeks ago I got the idea to make some juicy seared scallops, but visits to three different stores left me empty handed, so I moved on to something else.  But I couldn't get those little nuggets out of my head.  After my paella posting, I thought it was time to offer you a quick-cooking recipe, and scallops definitely fit the bill.  They cook up in less than 10 minutes, including time to make a yummy sauce to go with them, making them perfect for those nights when you want to get dinner on the table in a hurry.
Now you may be asking yourself why, instead of a picture of my beautiful scallops, is there a picture of the Golden Gate Bridge.  Well somewhere in that San Fransisco Bay lies my brand new smartphone, and the pictures of my scallops.  The phone was smart; it's owner, not so much.  I was picking my mother up from a cruise on Saturday, and while walking up the ramp to greet her, my phone fell out of my tiny jacket pocket (much to small to hold a phone, I realized too late!) and slid down the ramp and right into an opening just slightly larger than my phone, dropping into the bay.  Really??!  Yes, really.

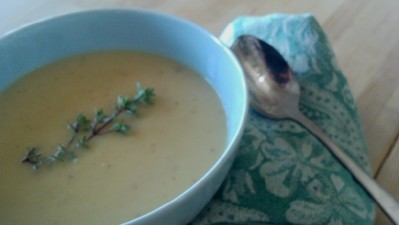
So here's a pic of seared scallops that I didn't take (my pots are in much better shape!).  But trust me on this one; it's easy, fast and delicious!  I served them over Trader Joe's spinach & chive fettuccine and topped it with a quick, creamy sauce.  It's dinner time in no time with this one....

Seared Scallops and Pasta
Serves 2

½ pound spinach fettuccine
1 tablespoon butter
1 teaspoon olive oil
6 large scallops, seasoned with salt and pepper
½ cup dry white wine
1t minced garlic
3T lemon juice
1 tablespoon capers
1t lemon zest
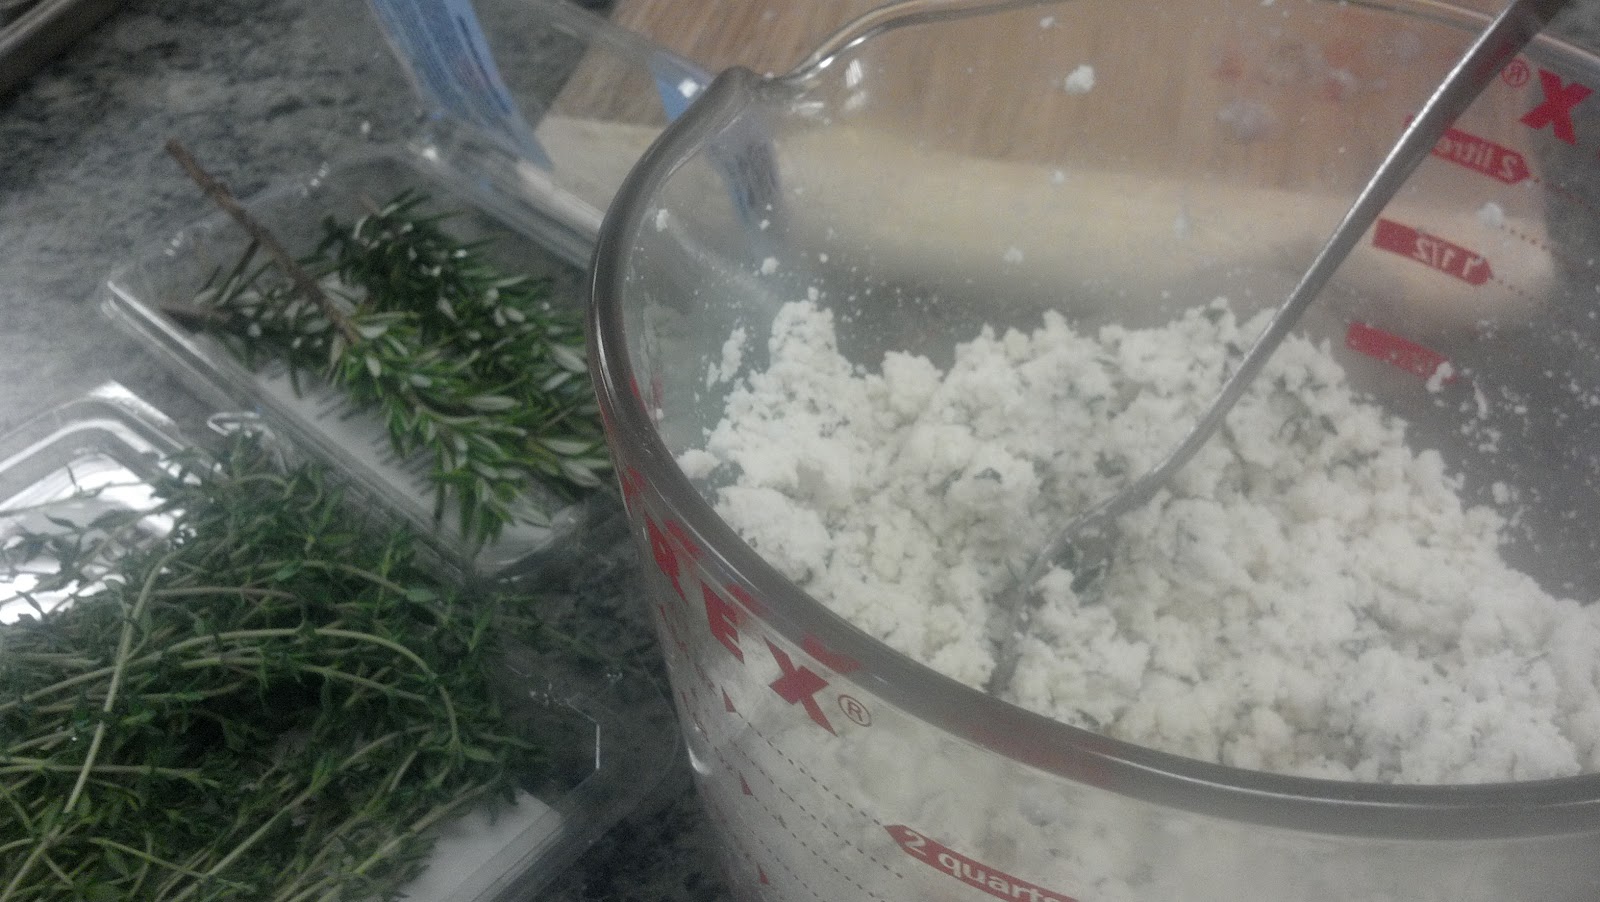
1t fresh thyme leaves
2T half & half
·         Cook fettuccine according to directions.  Reserve ¼ cup cooking water, then drain and return to pot.
·         While pasta cooks, melt butter and oil in a large skillet over medium high heat.
·         When butter starts to brown slightly, add scallops and sear about 3 to ­4 minutes per side.
·         Remove from skillet and keep warm.
·         Reduce heat to medium and add wine to the skillet, scraping up the browned bits on the bottom.
·         Add garlic and cook 1 to ­2 minutes, stirring often.
·         Add lemon juice, capers, lemon zest and thyme.
·         Remove from heat and stir in the half & half.  Add reserved pasta water to help extend sauce if needed.
·         Place pasta in a bowl, top with scallops and pour sauce over the top.

Pour yourself a glass of Sauvingnon Blanc and enjoy!!

Wednesday, April 25, 2012

Everyday Paella....any way you like it

I often tell people in my cooking classes that I love to cook, but I don't necessarily like to spend a lot of time doing it. That may have a little something to do with the fact that I also really love to EAT....get it into my belly now! So I work at creating dishes that are delcious and healthy, but also can be made quickly.  Paella is not one of them (it takes about an hour to prep and cook), but DANG is it good!  And because it's packed with veggies, rice, beans, and great proteins, it's all you really need to fix for dinner.  The ultimate one pot meal.

There are as many different versions of paella as there are cooks.  You can go from a completely vegetarian version all the way up to the traditional with pork, chicken, seafood and shellfish version.  The one constant is rice.  Any medium or short grain rice is acceptable; they absorb the liquid better than long grain rice.  That being said, I am partial to brown rice, but it takes quite a while to cook, so my preferred rice when making paella is arborio.  It will cook within 35 minutes and also creates a creamy texture, a bit like risotto.

Spring is my favorite season for paella, bacause I like to add asparagus, sugar snap peas and even fava beans to the mix.  This recipe doesn't include fava beans, because they need a bit of explanation....but I'll explain it here.  If you buy fava beans from the farmers' market early in the season (like now), they are very tender inside and only require a quick 3 minute blanching in boiling water.  Then cool and peel the skin away to reveal the tender bean inside.  People are under the impression that they are "hard to work with" because when you buy them later in the season or at the grocery store, where you have no idea about the freshness, the bean inside gets a tough coating around them that requires and extra step to remove.  So if you see them at the farmers' market in the next month, buy them and try them.  I'll try to post my fava bean dip recipe soon for a great first-timer's experience.

But until then......


Spring Paella
Serves 6

2 tablespoons olive oil
1 onion, diced
2 cups arborio rice
1 can diced tomatoes, drained  (reserve liquid to use if necessary)
¼ cup parsley, chopped
1 tablespoon minced garlic
1 tablespoon smoked paprika
1 teaspoon saffron
2 cups vegetable broth
1 cup water
½  cup dry white wine
1 15-oz can garbanzo beans
1 lb asparagus, trimmed and cut into 1” pieces
 2 carrots, diced
2 Italian chicken sausages, casing removed and crumbled in bite sized peices
½ lb peeled & deveinded shrimp
1/3 cup fresh peas (or frozen)
Salt & pepper to tast

  • Heat olive oil in a large, deep skillet over medium-high heat.
  •  Add onions and sauté until soft, about 5 minutes.Add rice and sauté 2 minutes.
  • Add tomatoes, parsley, garlic, paprika, and saffron, stirring to combine.
  • Add broth, water and wine and bring to a boil.
  • Reduce heat to low, cover and simmer for 15 minutes.
  • Add beans, asparagus and sausage.  Increase heat to medium-low, cover and simmer 15-20 more minutes, stirring often, until rice is tender.
  • In the last few minutes add shrimp and peas.  Season to taste with salt and pepper.
This one is worth the extra time....make a biiiig batch!

Monday, April 23, 2012

Saving the world one bite at a time!


"You'll know you're on the right path when things just start falling into place."  That's what my wise friend Randy told me when I first started on this journey to cook and teach.  And she was so right.  All along the way doors have opened for me and have helped me to build this nice little business cooking for families, teaching cooking classes and writing this blog.  And opportunites keep presenting themselves....

Last summer a lovely woman named Karen Pavone came to one of my cooking classes.  She sported a big, beautiful camera when she walked through the door.  I'm used to people sporting big, beautiful bottles of wine when they come to a class, but a professional camera is rare.  She asked if I minded her taking pictures because she was working on a blog for The Novato Patch about the farm to table experience.  Although I wish I had spent a little more time on my hair that day, I said that I would love for her to take pictures and write about my classes.  Turns out Novato Patch was interested in Karen, but not Cooking by the Bay because I was based in San Rafael and not Novato.  But now Karen has launched another great blog and finally was able to share her article about my cooking classes.

Her blog post sparked a meeting between me and Lisa Marvier, owner of Farm Girl Nursery.  Lisa has created a wonderful farm & nursery on her one and a half acre property off Indian Valley Road in Novato.  Covered with gorgeous produce, seedlings, flowers, eggs, honey... there are even chickens, two pigs that think they're dogs (they come running when Lisa calls them by name), and horses.  She has created a little store, too, filled with seeds, books, tools and all the things get you going in your own gardening experience....


It is nothing if not inspiring....I spent an hour there and didn't want to leave. I'm not a jealous girl by nature, but I was so jealous of this beautiful oasis that Lisa has created....

After a delicious tour of the property, we talked about our shared desire to teach people how easy it is to eat better, to feed the soul as well as the body, and most importantly about our desire that kids today would learn that real, whole foods are fun to grow and can be just as satisfying, if not more so, than the processed foods so many of them have grown up eating.

Together we hope to create kids' camps this summer where children can come and spend "a day on the farm," pet the farm animals,, take a ride on the zip line, pick produce, create dishes that we'll cook together and settle down for a delicious picnic lunch on the sunny lawn.  Best of all, Lisa plans to send each child home with the recipes and fresh produce so they can recreate their dishes at home for their parents. 

We left each other that day with a hug and a wish to "change the world, one bite at a time."  If you're interested in Farm Girl Nursery's kids' camps, contact me at Suzanne@CookingbytheBay.com.

Thursday, April 19, 2012

A Healthier Risotto

It was going to be one of those days.  First of all, I spent a good five minutes walking around my house looking for a pair of my "cheaters" reading glasses.  Once I found them I went to put them on my face only to find....that I was already wearing a pair! Not my finest moment. (And don't you think I should've found them faster, since I was wearing glasses??)

 
So it shouldn't be surprising that my brain cramp might not be done with me yet. The perfect blog entry came my way when Bauman College's Chef Marcella said, "Let's make a farro risotto today." I was excited because I had been toying with this idea for a while, but hadn't gotten around to it.  Farro (also known as spelt, which sounds much less sexy) is a whole grain, which you know I dig over "the white stuff."  In the case of risotto, that white stuff is arborio rice.  Tasty and so creamy, but not a whole lot going for it in the nutrition game. Farro, on the other hand, is a great source of protein and fiber (at least double that of most common commercial grains), stimulates the immune system and helps lower cholesterol.    

OK, back to the brain cramp.... I prepped the ingredients and diligently took pictures along the way of all the beautiful produce in preparation for my blog post:
...the rainbow carrots,
the sugar snap peas (THAT'S a labor of love and a good excuse to get a manicure the next day; fingernails aren't supposed to be green, are they???),

 
red onion, leeks, and asparagus.

And then what do you think happened?  Did you guess that I ate my entire bowl of wildly good risotto, left class, drove home and then realized as I walked in the door that I forgot to take a picture of the final product!!?

So bummer, guess I have to make it again.  And EAT it again.  Poor me.

Farro Risotto
Serves  4

3 cups vegetable broth (you know I love Trader Joe's low sodium one)
2 tablespoons unsalted butter
1 cup chopped onion
1 bunch asparagus, cut on the diagonal in 1" pieces
2 teaspoons minced garlic
1 cup farro
1/2 cup dry white wine
1 tablespoon fresh thyme leaves (I used lemon thyme...because I grow it and it's my favorite)
1/3 cup peas
1/4 cup half and half
1/2 cup goat gouda (that's cheese, people)
1 teaspoon lemon zest
Salt and pepper to taste
1/4 cup chopped walnuts or pecans

  • Bring broth to a simmer over medium heat.  Keep warm, but don't allow to boil.
  • Melt butter in a large skillet over medium high heat.
  • Add onions and saute, stirring occassionally, for five minutes until beginning to soften.
  • Add asparagus and continue cooking 3 to 4 minutes, stirring occasionally.
  • Add garlic and cook 1 minute, stirring constantly.
  • Stir in farro and toast for 2 minutes.
  • Begin adding broth a half a cup at a time and stirring constanlty until liquid is absorbed.  (Sometimes I add water to the broth if I start to run low, so I am sure to have enough warm liquid to add; you never want to add cold liquid)
  • Continue adding broth a little at a time until farro is soft, about 20 to 30 minutes.
  • Add peas, thyme, half and half and cheese.  Stir until fully combined.
  • Stir in lemon zest and season to taste with salt and pepper.
  • Top with chopped nuts.
Thank me later!!!


Monday, April 16, 2012

Size does matter...

That's my dog Maxx on the right.  Yes, the big one. The other two, Bella and Ginger, belong to my friends Justin and Jill.  They are all Yorkies (not Justin and Jill, of course), but Maxx is obviously a little....uh, larger.  Justin prefers the word "fat;" I prefer the term "well-loved."  But realistically, he's "well-fed."

So recently I enacted a little portion control in his life.  That and a much-needed haircut, have reduced his size to a healthy, happy one.  If only a haircut worked that way on the rest of us!  Since it doesn't work that way, and since I was recently blamed for a certain someone gaining 5 pounds since we started cooking together, I thought mabe a little blog about portion control was in order.

The problem with cooking great-tasting food (and living alone) is that it's hard to not go back for seconds!  Because I write recipes for my cooking classes as well as for this blog, I generally prepare recipes that serve four to six people..... keeping myself to just one serving when a big pot of deliciousness is staring at me is a challege some days. 

So here's a little guide on what "a serving" looks like.  I refer to it in my classes as "a serving that's healthy," not  to be confused with "a HEALTHY serving," like what you see in most restaurants....which is waaaay too much food.

A serving of animal protein (chicken breast, fish, meat, etc) should be about the size of a deck of cards.
A cup of veggies or fruit is about the size of a baseball.
A half cup of grains, beans, pasta, etc. is about the size of your computer mouse.
1 1/2 ounces of cheese is the size of 2 9-volt batteries (not to be confused with the deck of cards, Suzanne!)
1 teaspoon of oil or other fat is about the size of your thumbnail (unless you have really large hands!)

Hope that helps put things in perspective, and helps you stay comfortably in your favorite jeans!

Friday, April 13, 2012

Looks aren't everything...

...or so celeriac tells itself. And in this case celeriac (or celery root) is correct!

April marks the start of celeriac season in California, so when I saw it at the market I purchased one without really knowing what the heck I would do with it. I was just so excited to see something other than kale, sweet potatoes and butternut squash after a loooong winter.  I put the celeriac on the counter and just looked at it for a couple days, waiting for it to somehow tell me what it wanted to become.  Then it hit me....I had made a sunchoke soup last fall that was out-of-this-world good; maybe this little guy would be my springtime substitute, since sunchokes won't be in season again for many, many months.

You'll need to cut off the rough skin, exposing the white flesh beneath.

You'll immediately smell the familar celery aroma.  Cerleriac had a nice mild flavor and can be eaten raw or cooked.  It would be great shredded in a salad, braised with greens, or roasted with a little sprinkling of olive oil.  But the rainy weather this week had me craving soup, so I pulled out my favorite kitchen helper,
The Flavor Bible, to see what other ingredients celeriac likes to hang out with. Apparently apples, butter, thyme, potatoes, and nutmeg aren't put off by this guy's looks.  So let's get them together and into my belly...

Creamy Celeriac Soup
Serves 6

2 tablespoons butter
1 cup chopped onion
1 celeriac, peeled and chopped into bite-sized pieces
1 medium red potato, diced
1 fuji apple, peeled and diced
4 cups vegetable broth
1/2 cup goat kiefer (or buttermilk)
2 teaspoons fresh thyme leaves
1/2 teaspoon freshly grated nutmeg
salt and pepper to taste

Melt butter in a large saucepan over medium heat.  Add onions and saute for 3-4 minutes until softened.  Add celeriac and continue to cook an additional 5 minutes.  Add potato, apple and vegetable broth.  Increase heat and bring to a boil.  Reduce heat, cover and simmer 20 minutes until celeriac is tender.   Working in batches, puree soup in a blender and return to pot.  Stir in the goat keifer (or you can use buttermilk),thyme, nutmeg, salt and pepper and cook over low heat for 5 minutes.  Garnish with a thyme sprig.


A note about goat keifer:  I really like the tang that this gives the soup, but if you're not a fan of goat cheese, you probably will want to use buttermilk instead.  Goat keifer is fresh goat milk that has live keifer cultures added to it. This probiotic-rich milk strengthens the immune system and promotes digestive health.  I wouldn't drink a glass of it on a dare, but I do like to add it to soups, sauces and smoothies.
Enjoy!


Tuesday, April 10, 2012

To cheese or not to cheese...

....that is ALWAYS my question.  And usually I go with CHEESE!  But if you know me, or followed my posts, I have been trying to break up with cheese for a while.  I've become too dependent on it in my cooking, and although I'm not lactose intolerant, I know that I feel better without it.

So..... today in class I made an almond milk, and when you strain the milk, you get this "almond meal."  When I dumped it into a bowl, it immediately reminded me of ricotta...the look, the texture, the consistency.  Man, does everything remind me of cheese?????
If you've never made nut milk, it's super easy.  Two ways to do it.  You can soak the nuts overnight; now, I'm not good at that.  The only thing I really do well ovenight is sleep....and I'm GOOD at it.  My friend Sue once said when I bought a hammock for the backyard, "Yeah, that's all you need - another place to sleep!"  I think she was still jealous that I slept all the way from SF to Hawaii, while she sat next to my mother, who also couldn't sleep, but I'm SURE could talk.

Anyway, if you're not a pre-planner like me, you can blanch 1 cup of almonds in boiling water for a few minutes and then drain and rinse.  Then slip the skins off and put in a blender with 3 cups of water and let 'er rip for a while until completely smooth.  A Vitamix is perfect for this, if you're lucky enough to have one (I am not....boooo).  Then press the milk through fine cheesecloth (a paint strainer from Home Depot works even better and can be used over and over), and you are left with the almond meal.

Most people will throw that away.  Don"t do it!  Add some chopped fresh herbs (I used thyme and rosemary), a couple pinches of salt, a squeeze of lemon juice, and a 1/2 teaspoon of nutritional yeast (there it is again - stop making that face!) and you have a delicous, dairy-free ricotta. 


Use it in lasagna or anywhere you would use ricotta (like on a spoon.... a BIG spoon!).  I served it up on crackers and wowed the crowd.....love when that happens.
Two treats in one.  The almond milk isn't something that would ever replace a nice, big, ice-cold glass of milk for me, but I do like it in coffee, a smoothie or over my granola or cereal.  That's just me.  You can add vanilla, cinnamon and/or stevia to sweeten it up - and that way, I know a lot of people who like to drink it.  I still remain true to my California cows for that tall glass of milk....

Monday, April 9, 2012

And now I'm feeling a little saucy....

I have a client that I cook for who is a personal chef's dream.....she loves everything I cook, and after 3 or 4 years I don't even need to run my ideas by her.  So I whipped up a couple of her known favorites: a stacked veggie enchilada bake and a smoky tilapia with papaya-cilantro salsa.  Then I spied a large bunch of basil languishing in my fridge.  I bought it days ago with some great idea in mind, I'm sure, but the weekend ran away with me and now it was use it or lose it time.  What to make???

My improv cooking skills have been honed between having to cook for the students at Bauman during the first few weeks of their program (man, I'm so glad THEY start cooking full dishes themselves this week!) and spending weekends with Tom with what I have come to fondly refer to as the "What Can We Make With This?" experiments - a sample of which looks like this:

This is a little game we like to play where we pull out whatever hasn't yet died in our refrigerators, and turn it into something delish!  And it has sharpened my skills at pulling together a meal using what I have on hand.

I have a pretty well-stocked pantry, freezer and fridge.  In fact, I was asked recently if this was all in preparation for a natural disaster.  No, funny-pants, it's just because I love to cook and don't like to shop so much.

So back to my poor bunch of basil... who doesn't love pesto?  I always have the usual suspects on hand: garlic, nuts, olive oil, and cheese.  But I'm newly inspired to try out some variations on the old standard sauces.  I decided to make a dairy-free version.  I KNOW, who would think that sentence would ever escape my lips....dairy-free?  Suzanne?  That just does not sound right.  But it sure tastes right!  Here's the trick - substitute nutritional yeast for the cheese (stop making that face!).  When I was first introduced to the concept of nutritional yeast while I was in the Natural Chef Program myself, I took a wiff and thought "Gross!  What have I gotten myself into here?"  But it's about the taste, not the smell.  Nutirional yeast gives food a cheesy flavor and also is a rich source of B vitamins, especially B12, making it especially beneficial for vegans and vegetarians.  But forget all that - it makes food taste good!
Yes, that is an indentation from my finger in the middle of the sauce...couldn't resist!


Dairy-free Pesto Sauce
1/3 cup walnuts
2 teaspoons chopped garlic (please use fresh!)
4 cups packed basil leaves, stems removed
2 tablespoons nutritional yeast
Zest and juice from half a lemon
1/2- 3/4 cups water
1/4 cup extra virgin olive oil
Salt & pepper to taste
·         Place garlic and walnuts in a food processor and pulse to finely chop.
·         Add basil, nutritional yeast, lemon zest and juice and process until a paste begins to form.  Scrape down the sides.
·         Place water and oil in a measuring cup and with the motor running, slowly add until desired consistency, stopping and scraping down the sides as necessary.  You may use less or more water depending on your preference.
·         Season to taste with salt and pepper.

I tossed it with orzo, sauteed red onion, quartered kalamata olives and sundried tomatoes.
I hope you get inspired to dig into your pantry and fridge to find a delicious
 improv just waiting to be discovered!
 

Friday, April 6, 2012

Feeling a little nutty

I wish I could take credit for this one, but it's a recipe from Bauman College's Natural Chef curriculum.  I'm back in the fold, working as the kitchen manager at the Penngrove campus, and it makes my mind and my belly happy, happy, happy.  It's great to be able to essentially go through the Natural Chef program again without any of the stress I felt as a student.....and have them pay ME this time!  Even better, is getting to experience all those delicious recipes again;  recipes like this Nut & Seed Cream Sauce.  It's a fantastic, dairy-free cream sauce, much like an Alfredo.  Great on pasta (obviously), on roasted veggies, over grilled chicken, served cold as a dip.....heck, you could put it on a shoe and it would be delish!  I need all my shoes, so I tossed it with spaghetti squash, fresh English peas and toasted walnuts.  They only changes I made to the sauce were that I used my French Herb salt to give it more flavor and finished it with a healthy pinch of freshly grated nutmeg - buy the whole nutmeg and shave it with a microplane.... soooo much better than the ground nutmeg in a bottle.

If you've never cooked spaghetti squash, give it a try, especially if you have kids.  It's a great way to get extra veggies into them in a familiar kind of way.  Cut it in half, scoop out the seeds and bake it cut side down for 30-45 minutes at 375, depending on the size of the squash.  When the squash is cooked through it will give gently when squeezed.  Let it cool, and then scrape out the flesh with a fork.  Simply toss with sauce and any other ingredients you'd like.....

Nut & Seed Cream Sauce

1/2 cup cashews
1/2 cup macadamia nuts
1/4 cup lemon juice
2 tablespoons nutritional yeast
2 tablespoons sesame seeds
1 tablespoon onion powder
1 1/2 teaspoons salt
1 teaspoon garlic powder
1/8 teaspoon celery seed
1 1/2 cups water
1/4 cup olive oil
white pepper to taste

Add all ingredients besides oil and pepper to a blender and puree until smooth.
With the motor running, drizzle in the oil.
Transfer to a saucepan and simmer on low heat for about 10 minutes until thickened and warmed through.
Season with white pepper to taste.
Try not to eat the whole thing yourself!

Monday, April 2, 2012

My 80/20 Rule

Yesterday Tom (TomFoolCookery)made me a ridiculously delicious tamale pie for dinner.


When someone wants to cook me dinner, I don't fight it. I may struggle with some of the ingredients, but I don't fight it. I figure it's all part of my 80/20 rule: 80% of the time I eat good, real, seasonal foods, so the other 20% of the time I don't beat myself up if I go off the path.  And this was a yummy path to venture down.

But with a belly full of canned food, beef and pork sausage (oooh, but my mouth waters thinking about it), today was time to get back to something a little lighter and less....meat-y.
So I tossed some spinach fettucini with kalamata olives, toasted walnuts, caramelized onions and a touch  of goat cheese.  I'm not a huge fan of tomato sauces; I'm more of a cream-sauce girl, but that's where the trouble starts (and the waistband tightens), so I've taken to saving a 1/2 cup or so of the starchy pasta water, and stirring it into the pasta mixture with some lemon juice or white wine, and some lemon zest.  Cook it down for a few minutes on medium-high heat, and you'll be surprised at how tasty it is. The little bit of goat cheese satisfies my creamy craving, and I can feel good about eating a healthy bowl of this.