Monday, December 23, 2013

Velvety Mushroom Soup

I always crave soup this time of year...the weather is chilly, and a nice bowl of hot soup warms me up and just hits the spot.  I've been making a lot of butternut squash variations, spicy pumpkin and hearty chili.  I was looking for something new to try.

I'm in love with a book I "borrowed" from my sister (you have to actually give it back for it to be considered borrowing, and I'm not sure I'm there just yet!).  It's called Fresh Happy Tasty, by Jane Coxwell.  She was the personal chef to Diane Von Furstenberg, and I share her approach to cooking: real food, fresh ingredients, simple preparation.

While reading it cover to cover, I spied a mushroom soup recipe that was described so beautifully that I knew I had to try it.  I made just a couple changes (I added some goat yogurt, used a large shallot instead of red onion and added a little more oil when sautéing the veggies), but either way, it's so perfect and simple that I wanted to share it with you.

I was first struck by the fact that she broiled the mushrooms; this brings out all their warm, earthy flavor.  I usually sauté my veggies when I make soup, but I was excited to try this method.  Toss a pound of sliced mushrooms with some olive oil, fresh thyme leaves and sea salt (Jane loves Maldon sea salt, and I do too - its large flakes give wonderful flavor).


Lay the mushrooms out on a baking sheet and broil for about 10-15 minutes, tossing occasionally, until browned, being careful not to burn them.


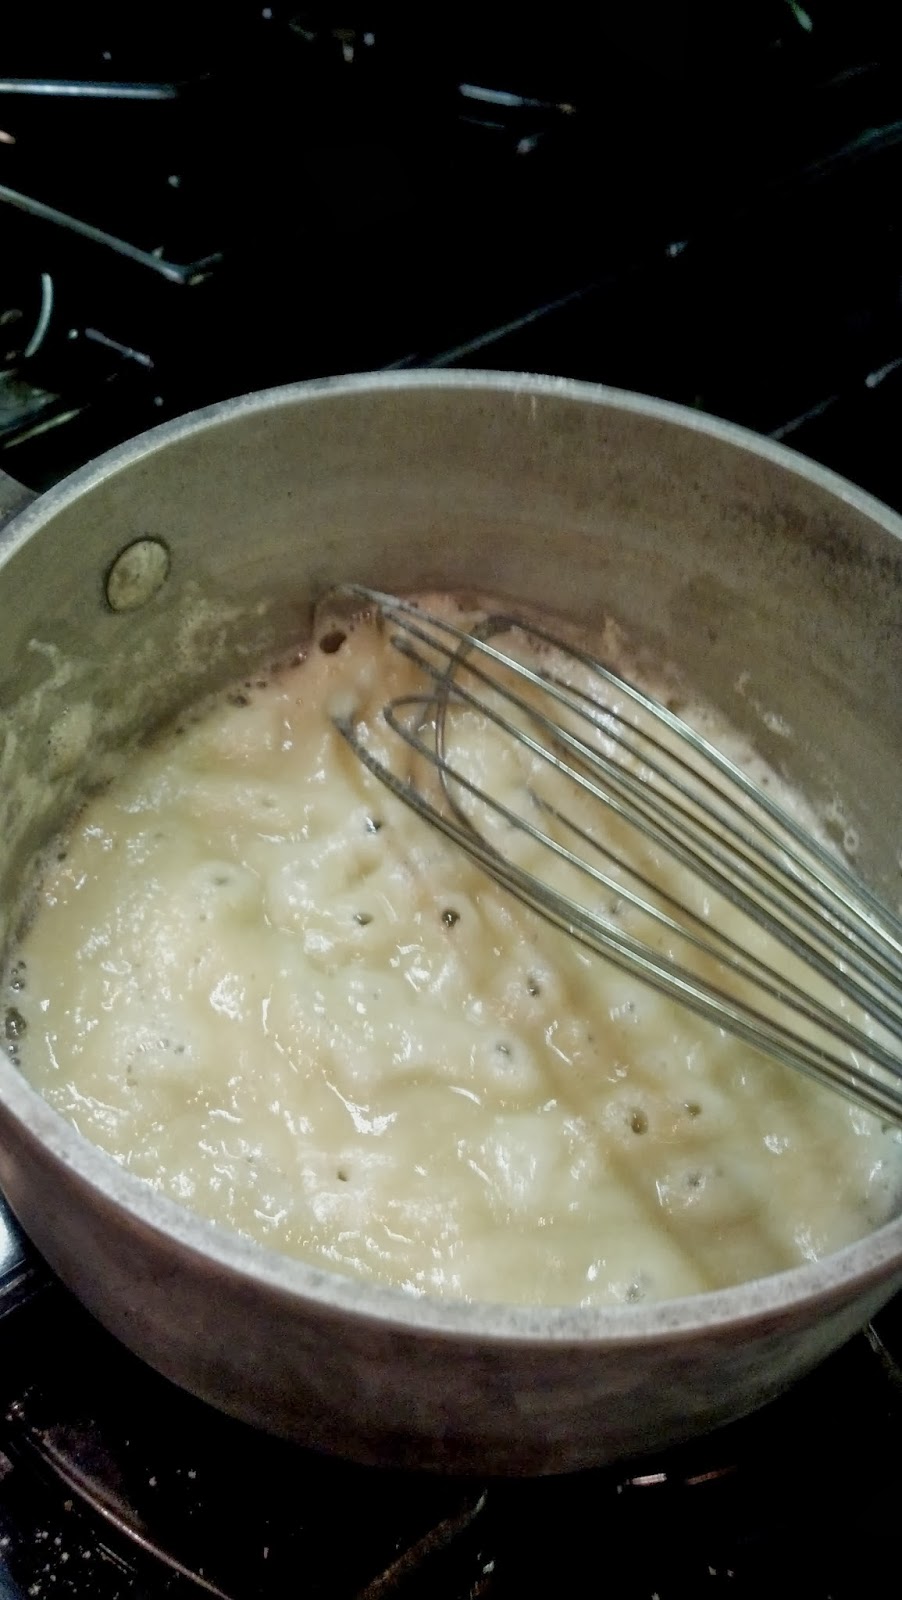
When mushrooms are done, place in a medium saucepan with any of the juice from the pan and a little olive oil.  Add chopped shallots (or red onion) and a few cloves of garlic.  Saute until the shallot is softened, stirring occasionally so garlic doesn't burn.  As far as chopping goes, you're going to puree this, so you can do a bit of a large chop, so nothing burns.


When shallots are soft, add enough broth to cover.  I used 2 1/2  cups of chicken broth (you can keep it vegetarian by using vegetable broth).  I ended up adding another 1/4 cup when I pureed it to get the consistency I liked.  Bring this to a boil, reduce heat, cover and simmer 20 minutes.

Transfer to a blender and puree for at least 2-3 minutes until velvety smooth.  If patience is not your strong suit (like me), you're probably used to just blending it until everything is combined.  But trust me on this one....let it go for a few minutes and it becomes so silky and delicious.  Jane says about most of her pureed soups, "when you think it's smooth enough, blend even more."  She's absolutely right!

Now this is where I like to play, and encourage people in my cooking classes to taste and balance their flavors.   A soup or sauce is a great place to start learning about adding elements to create the perfect taste.  You can see what I added below, but start playing this little game with yourself: taste the soup, and then add a pinch of salt.  Taste it again and see how the flavors have woken up.  Try a little acid - vinegar, citrus juice, yogurt - and see what that does to the flavors.  If you're nervous about ruining a whole pot of your soup, put a little into a small bowl and play with just that amount.  When you've figured out your secret formula, then you can add it to the pot.

I added goat yogurt (has a nice tanginess about it, and is tolerated by most people with lactose issues), some lemon juice, and a pinch of salt.  And viola!  A little bit of sourdough and I was in heaven.  A perfect lunch to get me ready for wrapping Christmas gifts!  Speaking of, this would be a nice addition to your usual Christmas Eve dinner - maybe little mushroom soup shooters to start the meal.....


Velvety Mushroom Soup
Serves 2-3

1 lb. sliced cremini mushrooms
leaves from 4 sprigs of thyme
1/4 teaspoon salt
1/4 cup olive oil, plus 1 tablespoon
1/2 cup chopped shallots
2 teaspoons chopped garlic
2 1/2 cup chicken broth, plus extra for desired consistency during puree
1 tablespoon plain goat yogurt
Juice of half a lemon
Sea salt and pepper to taste
Goat yogurt and thyme leaves to garnish
  • Preheat broiler
  • Toss mushrooms, thyme, salt and 1/4 cup olive oil in a large bowl.
  • Place in a single layer on a baking sheet and broil, turning occasionally, about 15 minutes until browned, being careful not to burn.
  • Heat remaining tablespoon of oil in a medium saucepan over medium heat.  Add mushrooms and any of their juices from the pan, shallot and garlic.  Saute, stirring occasionally, until shallots are softened, about 3-5 minutes.
  • Add 2 1/2 cups broth, or enough to cover mushrooms.  Bring to a boil, reduce heat, cover and simmer 20 minutes.
  • Transfer to blender, add goat yogurt and lemon juice and puree 2-3 minutes until velvety smooth, adding more broth if needed to reach desired consistency.
  • Season to taste with salt and pepper to your taste.
  • Garnish with a dollop of yogurt and a couple small thyme sprigs.

Monday, December 9, 2013

Roasted Grape & Pancetta Risotto

I went to the farmers' market the other day (one of my favorite things to do) and met a farmer who still had grapes.  He told me that in Northern California we have about one more month of red seedless grapes, so I bought a bunch.  I like to eat seasonally (have you heard?), so when I hear or know that I have months to wait for a sweet taste of something, I have to try to get it while I can.

Here's the other thing about me: I like to do things out of the ordinary with the food I buy.  Not always, but sometimes.  And this was one of those times. I bought enough grapes to just enjoy them as they are, to freeze them on a sheet pan for a little frozen treat later, but I was still left with about a pound.  What to do?


Roast them!
 
 
I know it sounds weird, but why not?  I roast veggies all the time to bring out all the sweet loveliness, but what would happen if you roasted some fruit?  Well it just brings out even more sweetness, and gives it a little bit of earthiness, too.
 
 
Now what to do with them?  It's cold, I need a little comfort food, so...... risotto.
 
 
People seem to be intimidates by risotto.  Not sure why.  Did someone give us the idea that it was really hard, so we would end up paying top dollar for it in restaurants and be impressed by it when people cooked it for us???  It's actually really easy.  But it does take some patience and attention - you know one of those is not high up there in my wheel house (guess which one!?).  But if I can do it, you surely can!
 
 
I always start risotto with butter and olive oil.  Then I add chopped onions and garlic.  This time I also added pancetta.


Next comes the Arborio rice.  I add it to the skillet and let it toast for a few minutes, stirring it every once and a while.  Oh yeah, here's a thing:  I used to cook my risotto in a large saucepan.  Not sure why, but it seemed like a good idea at the time.  My mom questioned my method (but then when doesn't she?), and said she uses a skillet.  Thankfully she doesn't read my blog (somehow to "techie" for her), so I can safely say... shhhhhh...she was right.  Use a skillet.  I like to use my cast iron (of course).  It provides a nice even heat and lets all of the Arborio have a chance to swim around in the broth you're about to add.


Now most people will add wine here, before adding the broth.  And I used to do that too (of course you're going to do what everyone else does).  But a couple summers ago I was doing a demo at the Union Street Festival in San Francisco and was testing one of my risotto recipes over and over to get it right.  A chef friend I knew suggested that I skip the wine and add vinegar at the very end.  I tried it, and it was genius (and delicious!).  So skip the wine (save it to drink!), and start adding broth.


You want to be sure that your broth is warm; keep it at a simmer in a pot next to your skillet.  Start with a cup once your rice is nice and toasty, and you continue to add a cup as the liquid evaporates.  This whole process will take from 30-45 minutes.
 
 
You want to wait until the liquid is completely evaporated before you start adding another cup Here's where it helps to be ambidextrous, which I'm not (if I try to stir the risotto with my left hand, most of it ends up on the stove top).  You have to stir constantly . Again, I learned this through trial and error.  Well, more error than trial.  That same chef friend I knew, who told me about the vinegar in lieu of wine trick, also taught me that if I stir my risotto constantly (instead of during commercials), I get a much better, creamier consistency.
 
After about 30 minutes you can see it really come together; it's getting creamier, the rice is puffing up, and if you taste it, it's almost there, just a little "toothy" (my super fancy culinary term for "almost done").  That's when I add a little half and half and cheese - this time I used Gruyere, but you can use any hard cheese like Parmesan or Asiago.
 
And because I like to introduce color (and fiber) into my dishes, I added some baby spinach, too.
 
 
After the spinach wilts, I add a hit of apple cider vinegar and fold in the roasted grapes.  The sweet of the grapes marries so beautifully with the saltiness of the pancetta. I just had to hit it with a little freshly cracked pepper (OK and a smidge of salt - I can't help it!)
 
This is happiness in a bowl, my friends.....
 
 
Roasted Grape & Pancetta Risotto
Serves 4
 
1 lb. red seedless grapes, halved
1 tablespoon olive oil
1 tablespoon unsalted butter
1 cup chopped onion
1 tablespoon chopped garlic
2 oz. pancetta, chopped
6 cups vegetable broth
1 1/2 cups Arborio rice
1/4 cup half & half
1/2 cup grated Gruyere cheese
1 tablespoon apple cider vinegar
Sea salt & pepper to taste
Chopped chives for garnish
  • Preheat oven to 400.
  • Placed grape halves on a parchment paper-lined baking sheet and roast for 10 minutes.  Remove from oven and set aside.
  • Heat oil and butter in a large skillet over medium high heat.
  • Add onion and sauté 5 minutes until lightly softened.
  • Meanwhile bring broth to a simmer in a saucepan over medium low heat, and keep at a low simmer.
  • Add garlic to onions and continue cooking, stirring occasionally for 1 minute.
  • Add pancetta and stir to combine.  Continue cooking, stirring often for 2-3 minutes.
  • Add rice and stir to coat.  Let toast, stirring occasionally, for 2-3 minutes.
  • Add a cup of hot broth to skillet and stir constantly until liquid is absorbed.
  • Add another cup of broth when all liquid is absorbed and continue stirring.
  • Repeat this process until rice is puffy and tender,
  • Stir in half and half and roasted grapes and cook an additional 3 minutes.
  • Add cheese and stir to combine.
  • When cheese is melted into the rice, add vinegar.
  • Season to taste with salt and pepper
  • Garnish with chopped chives.
 
Cook Happy!


Friday, December 6, 2013

Deconstructed Lasagna

My sister was out of town and my brother-in-law had a business dinner, so I went over to cook dinner for my nephew Cameron the other night.  He has Type 1 diabetes, so I wanted to fix him a hearty, kid-friendly meal that would also help keep his blood sugar in check.  Whether you have type 1 diabetes, type 2, or no diabetes, we all need to keep our blood sugar balanced.  They key to this is to start with a healthy fat coupled with a quality, lean protein and add some complex carbs.

So with this in mind, and the knowledge that my sister's cleaning woman was coming the next day, I decided on a one pot meal: a deconstructed lasagna.  I can be a real tornado in the kitchen, but I needed to keep it clean (for Rosa's sake), so I turned to my favorite kitchen pal, the cast iron skillet.  I can start my meal on the stovetop and then finish it off in the oven.


I started out with some olive oil in the skillet (healthy fat) and added grass-fed ground beef (quality, lean protein...remember that's the foundation for the blood sugar thing).  Then the first complex carbs (the final component in the blood sugar balancing act), onions and garlic (lots of it!).


When the meat is nicely browned (you can use ground turkey, pork or chicken in this, whatever you like) and the onions are soft, I added some basil and oregano, a ton o' tomatoes (canned, since the season is gone....sigh) with their juice and some part-skim ricotta.


Now here's where I made a little mistake.  The last time I fixed Cameron dinner, he inquired about one of the ingredients, either the mushrooms or the spinach.  As in "Are those mushrooms?" with a 15-year-old's snarl.  I simply said, "Yes, and they're good."  Turns out I think he asked about the spinach, because when he saw this dish he said (with the same snarl), "Is that spinach?"  Again, I said, "Yes, and it's good."  To which he scrunched up his face and said, "I can't eat spinach."  Not that he's allergic (he wishes!), but he thinks he doesn't  like it (along with most veggies, I later found out).  Whatevs!  Even if I knew he didn't like spinach (I blame his poor communication skills more than my poor memory), I'd still throw it in there... maybe just not so much.

Anyway, add the spinach (mushrooms, too!), and stir away until the spinach starts to wilt.  Then take some no boil lasagna noodles (I know, a refined carb - bad!- but I only used about 4 sheets for the entire dish, and it easily serves 4-6 people, so you're not getting nearly as much as in a traditional lasagna, so shush), break them into pieces, and bury them in the skillet under all the juicy goodness.


OK, so now I decided to make it a 2 pot meal, but you don't need to.  You could top it with mozzarella slices at this point and call it a day.  But I got the idea to make a little béchamel, like in my mom's famous lasagna.  So I made a roux (equal parts fat and flour - some people use more fat than flour, but this is how I was taught, and it works for me), whisked in some milk, added a little salt and nutmeg and let it hang out until good and creamy-thick.


I drizzled some of the béchamel over the mixture and tossed a few small slices of mozzarella on top.


Pop it in the oven for about 12-15 minutes until deliciously bubbly and the noodles are soft.  Take it out and hit it with some crushed red pepper flakes.  Let it stand for another 10 minutes before cutting into it.  This was another "Dang!" moment.  So flavorful, so oooey-gooey good.  This is comfort food at it's best, my friends.  And a whole lot easier than making a traditional lasagna.  I even got a mumbled, "Thanks, Aunt Suzie, that was really good."  High praise from a 15 year old who just wants to get back to his video game as quickly as possible.  I'll take it.

Go on, you know you want to....


Deconstructed Lasagna
Serves 4-6

1 tablespoon extra virgin olive oil
1 lb. grass-fed ground beef
2 tablespoons unsalted butter
2 tablespoons flour
1 cup milk
pinch each: sea salt and freshly ground nutmeg1 1/2 cups chopped onion
2 tablespoons chopped garlic
1 teaspoon dried basil
1 teaspoon dried oregano
1/2 teaspoon sea salt
1/4 teaspoon fresh cracked pepper
1 28-oz can whole tomatoes, and their juice
1 15-oz can diced, fire roasted tomatoes, and their juice
1/2 cup part skim ricotta
4 cups baby spinach
4 no boil lasagna noodles, broken into 4 pieces each
4ozs fresh mozzarella, thinly sliced
1/4 teaspoon crushed red pepper flakes
  • Preheat oven to 400.
  • Heat oil in large cast iron skillet over medium high heat. 
  • Add beef, breaking it up with wooden spoon, and cook until just a little pink remains.
  • Meanwhile start the béchamel:  melt butter in a small saucepan over medium heat.  Whisk in flour, stirring until smooth.  Cook until lightly golden, about 4-5 minutes.  Slowly whisk in the milk (if you put it in to quickly you'll get lumps), and continue stirring until smooth.  Cook over medium-low heat, stirring often for about 8 minutes (longer is better).
  • When beef is almost done (some pink still remains), add the onions and continue cooking, stirring occasionally for an additional 3-5 minutes until onions begin to soften, and no pink remains in beef.
  • Add garlic, basil, oregano, salt and pepper and cook an additional 1-2 minutes, stirring occasionally.
  • Reduce heat to medium and add tomatoes and their juices, stirring to combine.
  • Stir in ricotta.
  • Fold in the spinach and cook, turning the spinach into the hot mixture, until wilted.
  • Bury the broken noodles into mixture, fully immersing them in the liquid.
  • Drizzle some béchamel (some or all) over the mixture and dot with mozzarella slices.
  • Place skillet in oven and bake, uncovered, 12-15 minutes until bubbly and noodles are cooked.
  • Remove from oven, sprinkle with red pepper flakes and let stand 10 minutes.
so glad I have leftovers.....

Cook Happy!

Tuesday, December 3, 2013

Romanesco Soup

Baby, it's coooold outside!  When the temperature drops, my thoughts turn to soup.  I went to the farmers' market on Sunday and found a few things that I wanted to play around with.  One of those was a Romanesco cauliflower (sometimes called Romanesco Broccoli or Roman Broccoli).  I've seen it over the years, but never worked with it before - and I was in one of those moods......


Romanesco is an edible flower from the same family as broccoli, cauliflower and Brussels Sprouts. But it's much cooler looking (unless you're my friend Michael who's creeped out by it).  I thought of just sautéing it or roasting it with some olive oil and lemon, but that's a little boring.  And then it got so cold today, and I had soup on the brain.  I use regular cauliflower for soups when I cook for people who are lactose intolerant, because it makes the soup creamy, without the use of cream, so I knew this would make a velvety soup, with a nuttier, softer taste than cauliflower.
So I'm in!

Whenever I'm winging it, I always think about what flavors will go with the main event.  Some things naturally go together.  I made a list of everything that came to mind: leeks, celery, garlic, lemon, dill, curry (could go in so many different directions), coconut.  And a plan started to come together.  With my trusty notebook in hand, I went to work....


 First things first, you have to thinly slice your leeks, and then pop them into a bowl of water to get rid of any dirt inside.  People ask me all the time about leeks and green onions, and which parts you can use.  With green onions (I call them scallions, just to bug my friends) you trim the very ends and you can use the whole thing.  However, only the white and light green parts of leeks should be used, though the dark green stalks are great to add to your homemade stock.


 Cut up the Romanesco into small florets, trying to keep uniform sizes so that they cook evenly.

I sautéed the leeks and celery, then added some garlic.  In goes the Romanesco and a small Yukon gold potato (extra creaminess).  Then I added 4 cups of chicken broth.  If you want to keep it vegetarian, you can use vegetable broth, but I really like the little bump of flavor you get from the fat of a chicken broth (oh come on, fat is your friend - as long as you don't spend too much time together!).


This is usually my approach to making a soup, if I'm making it up as I go along.  I save the additional seasoning until after I puree it, and then I can play around with different ideas.  I take a little bit of soup in a bowl and add different herbs, spices, acids and see what I like, this way I don't run the risk of messing up the whole pot of soup.  The curry powder was a little heavy for me, and the dill took away from the flavor.
 
I wanted to keep it bright, so I landed on apple cider vinegar, lemon zest and goat yogurt (gives a nice tangy punch, and most people who are lactose intolerant can handle goat milk/cheese/yogurt.  It's very close to mother's milk, so our bodies can accept it better than cow dairy).   
 
Now, when I think of soup, I often think of grilled cheese sandwiches (OK, not doing this for my lactose intolerant clients).  It's the comfort thing, I guess.  And it works!  Today I whipped up a grown up version: melted brie, apple and rocket on sourdough with a hit of Dijon mustard.  Oh BABY! 
 
When was the last time you tried something new?  Ready to branch out?  Give this soup and sandwich combo a try.....and you can thank me later.


Romanesco Soup
Serves 6
 
1 1/2 tablespoon coconut oil
2 leeks, trimmed, thinly sliced and cleaned
1 stalk celery, chopped
2 teaspoons chopped garlic
1 lb. Romanesco cauliflower, cut into florets
1 cup chopped Yukon gold potato (about 1 medium)
4 cups chicken stock
2 tablespoons plain goat yogurt
2 teaspoons lemon zest
2 teaspoons apple cider vinegar
1/2 teaspoon salt
  • Heat coconut oil in a large saucepan over medium high heat.
  • Add leeks and celery and saute, stirring occasionally, for 5 minutes, until softened.
  • Add garlic and sauté one more minute.
  • Add Romanesco and potato and stir to coat.  Cook an additional 2-3 minutes, stirring occasionally.
  • Add broth and bring to a boil.  Reduce heat, cover and simmer 20 minutes until Romanesco is tender.
  • Working in batches if necessary, puree soup in blender.
  • Add yogurt, lemon zest, apple cider vinegar and salt.  Puree again to combine.
  • Taste and season with additional salt if desired.
 
 
Yum it up!

Monday, November 25, 2013

Butternut & Delicata Squash Gratin

Oh yeah, this is one of my "DANG!" moments, as I just took my first bite (and in no way my last!)
 
A while back my friend Marcella invited me over for lunch and made a crazy-good butternut squash gratin.  I couldn't get enough.  With the holidays approaching, I thought it would be the perfect side for Thanksgiving, so I asked her for the recipe. It seemed a little daunting, so I've put it off....until today.  That butternut isn't getting any younger, and neither am I!
 
Marcella had taken a Deborah Madison recipe and mixed it up a bit, and then I took hers and mixed it up a little again, not much, cuz it was soooo good.
 
I must say, this is a bit of a labor of love for someone like me, because it takes time and patience (I generally have more of one, less of the other - if you know me, you know which is which!).  But trust me, this is worth the little extra time.
 
One of the best things about this gratin is the layer of caramelized onions on the bottom.  I used 4 medium-sized onions (you can use even a couple more), thinly sliced them and sautéed them for about a half hour over medium heat in a little butter and olive oil.  I used a cast iron skillet, so I think I could've lowered the heat a little more and cooked them even longer, but on medium, some of them started to get a little overcooked, so I pulled them off the heat after 30 minutes.  A really good caramelized onion will take about an hour....go low and slow.


While they were cooking, I prepped the squash


I bought a 2 pound butternut squash.  I try to buy ones with a really long neck, so that I can just use that and not bother with the bulb end, which is always a little precarious to peel and deal with.  For this recipe, I had enough squash with just the neck.  I sliced the butternut and delicate into half moons and tossed them with flour in a large bowl.


When the onions were done, I put them in the baking dish and added sliced red potatoes and rosemary to the skillet. This is layer #2. Just cook them a few minutes, turning to get a little color on them and get the cooking process started.
 
 
Layer those guys on top of the onions in the baking dish.  And then cook the squash and some sage in the same skillet (adding more oil) until they get a little bit of browning, too.
 
 
When those puppies are done, layer them on top of the potatoes.  You're almost there!!  Well not really, you have to wait an hour to cook it.....I said it took patience!
 
When everything is layered in the dish, top it with blue cheese.  I use Pt. Reyes blue cheese because it's local (and I dig that) and it has such a powerful flavor that you don't need to use much.  If you use another kind of blue or even Gorgonzola, be sure to taste it to see how strong it is, and decide if you may need more.  We all know what a cheese hound I am, so if I can get away with only 3 ounces, don't go crazy, people.
 
Then a mixture of warm chicken broth and milk gets poured over it.  It'll help mix with the flour on the squash and create a tasty little "glue" that holds it all together (well, that didn't sound so tasty, but trust me.)
 
 
Cover it and bake it for 25 minutes.  Then take off the foil and add chopped walnuts (or pecans) and return it to the oven, uncovered, for another 20 minutes. 


Pull it out and try to not stick your face in it!
Let it sit for about 10 minutes....patience is a virtue, peeps.  And today, for once, I was virtuous.
 
And this is what you get.  The most delicious gratin on the planet!  The squash is tender and savory, the onions are beautifully sweet, the rosemary potatoes are hearty, the nuts give it a perfect crunch against all that tender goodness, and the cheese.....oh, the cheese.
 
 
I hope this finds it's way onto your holiday table!
 
 
Butternut & Delicata Squash Gratin
Serves 6-8
4 tablespoon olive oil, divided
2 tablespoon unsalted butter, divided
4 large onions, thinly sliced
2 lb butternut squash
1 delicata squash (about ½ lb)
3 tablespoons flour
6 baby red potatoes, thinly sliced
1 tablespoon diced fresh rosemary
1 tablespoon chopped fresh sage
½ cup milk
2 tablespoons chicken stock
3 ounces Pt. Reyes blue cheese, crumbled
1 cup chopped walnuts
Salt & pepper to taste
·         Heat 2 tablespoons olive oil and 1 tablespoon butter in a large skillet over medium heat.
·         Add onions and sauté, stirring occasionally, until browned, about 30 minutes.
·         Meanwhile, cut butternut in half just above the bulb end.  Peel, seed and cut each half in half again, lengthwise.  Cut into thin half moons and place in a large bowl.
·         Cut delicate in half lengthwise, seed (no need to peel), and cut into thin half moons.  Add to butternut squash.  Toss with flour and set aside.
·         When onions are done, season with salt and pepper and place in the bottom of a 7X11 baking dish.
·         Preheat oven to 350⁰.
·         Heat remaining tablespoon of butter in same skillet.  Add potatoes and rosemary and cook about 4-5 minutes to lightly brown.
·         Layer the potatoes on top of the onions.
·         Add remaining 2 tablespoons oil to skillet.  Dust off excess flour and add squash slices and sage, turning to coat.  Cook about 5 minutes just to warm through a bit.
·         Layer squash on top of potatoes and season this layer with salt and pepper.
·         Warm milk and broth in a small sauce pan.
·         Top squash with cheese and pour milk mixture over the entire gratin.
·         Cover and bake 25 minutes.
·         Remove cover, add nuts and continue baking, uncovered, an additional 20 minutes until bubbling and lightly browned.
·         Remove from heat and let stand 10 minutes.
 
oh yeah, you can thank me later.....


Friday, November 22, 2013

Grilled Persimmon Salad

My friend Chris came to a cooking class last week and brought me a gy-normous persimmon from her garden.  She plopped it in my hand and said, "See what you can do with that!"


It's been sitting there in my fruit basket staring at me every time I walk in to the kitchen.  Taunting me..."hey, what are you going to do with me?"  I know they're great in salad, so I went to the market for a little inspiration.  I came home with a pomegranate (it's color goes so beautifully with the persimmon, and gives the salad a nice little crunch), an avocado and a package of romaine hearts.  Doesn't get much easier than that.  But there that persimmon sat for the past few days.
 
 
So today after spending a few hours working in my office, I was getting hungry.  I was in the mood for something warm, but I also wanted something easy.  And there was that persimmon looking at me.  And then I got an idea.


I absolutely love a grilled salad!  it's so much more interesting than just plain ol' romaine leaves.  Cut the romaine in half and brush with olive oil.  Cut the persimmon into wedges (I only used about half of that guy), and place it all on a hot grill (got to love California weather; it's almost Thanksgiving and I'm still grilling).  In just about 3 minutes, flip the romaine and persimmon pieces and let it grill up on the other side for another 2-3 minutes.  You can serve the romaine whole , which makes for a very pretty presentation, but I think it's easier to eat if you cut it up.


I chopped half the avocado and added it to the salad along with the pomegranate seeds,  and then made a quick dressing with the other half.  I dig this salad more than I ever thought I would. Grilling the persimmon give is a sweet, smoky, peppery flavor and it's so tender.  Mixing it with the sweet and crunchy pomegranate seeds was genius (can I say that?)...and makes it sooo pretty.

I think this festive salad is worthy of being on your holiday table this season.

Grilled Persimmon Salad
Serves 2

1 large head Romaine hearts
1 medium persimmon, cut into 12 wedges
1 pomegranate
1 avocado
Juice of half a lemon
2 sprigs fresh thyme leaves
Pinch salt and pepper
1/4 cup olive oil, plus extra for grilling
  • Preheat grill to medium high heat.
  • Cut romaine in half lengthwise, keeping stem in tact.  Brush cut side with olive oil.
  • Place romaine and persimmons on grill, close cover and cook 3 minutes.
  • Flip romaine and persimmons over and grill an additional 2-3 minutes, until persimmons are slightly tender.
  • Cut avocado in half.  Chop half for salad.
  • Place the other half in a small blender or mini chopper, add lemon juice, thyme leaves, salt and pepper.  Blend until combined, then with the motor running, slowly add olive oil and a little water if needed to thin out the dressing.
  • Place romaine on plates, top with persimmons and avocado.  Sprinkle with pomegranate seeds and drizzle with dressing.

You can thank me later......


Monday, November 18, 2013

Butter Me Up!


Last night I was hungry, but didn't feel like going to any major effort to get some food in my head.... it's been a loooong week.  So I went to the store and roamed the aisles looking for inspiration.  I found it in a package of fresh potato and ricotta gnocchi.  I make my own (and sweet potato gnocchi - yum!), but I just didn't have the energy for that, so I broke my "no packaged food" rule - fitting perfectly in my 80/20 rule.  The 80/20 rule is that 80% of the time I eat right (real, healthy, whole foods), so that 20% of the time when I veer off track, I don't have to beat myself up.

Maybe it's the time of year, maybe it's the simplicity that I was looking for, but either way, I was going to really work that 80/20 rule with a Sage-Brown Butter Sauce.  When I posted the picture of my dinner on facebook, I got a huge hit of "likes" immediately....everyone loves butter, apparently! Duh.

This is such a great quick weeknight fix...I think once the water was boiling, it took about 5 minutes to get dinner on the table.

Bring a large pot of salted water to a boil and toss in the gnocchi.  When they float to the top, they're done.  Get them out with a slotted spoon, and save the cooking liquid in case you want a little starchy water for your sauce.  I use this approach whenever I cook pasta.


I grow sage in my backyard, so I plucked about 8 leaves for my sauce.  You can put them in whole, which looks pretty, but I like to run a knife through them, rough chop, to release even more of that earthy sage flavor.


Melt a stick of butter (I know, it hurts me a little bit to write that, but once in a while it won't kill you) in a large skillet and add the sage leaves.  When the butter is sizzling, add walnuts or pecans, and continue cooking a few minutes until butter starts to brown and nuts get lightly toasted.


Add the gnocchi to the skillet and toss it in the lovely sauce.  I added a little bit of chopped spinach (trying to make me feel better about all the butter!) and then topped it all with a tiny bit of gorgonzola.  I can hear the leftovers calling my name.


Oh come on, you know you want to.....

 
Gnocchi in Sage Brown Butter Sauce
Serves 2-3

12 oz. fresh gnocchi
1 stick unsalted butter
8-10 sage leaves, roughly chopped
1/2 cup walnuts or pecans
2 cups chopped baby spinach
2 tablespoons crumbled gorgonzola
Salt & pepper to taste.
  • Bring a large pot of salted water to boil. (Pasta water should taste like the sea.)
  • Add gnocchi.  When they float to the top, they are done; just a few minutes.  Remove from pot,
  • Meanwhile melt butter in a large skillet over medium heat. 
  • Add sage.
  • When butter begins to sizzle, add nuts and stir to coat with butter.
  • When butter begins to brown, after about 2-3 minutes, add cooked gnocchi and spinach.
  • Stir until spinach is wilted.
  • Remove from heat, top with gorgonzola and season to taste with salt and pepper.

You can thank me later......


Tuesday, October 15, 2013

Veggie-Chickpea Curry


 I got a fistful of "what the heck?" today. 
 
I recently started volunteering at my friend Francesca's Ceres Project in Sonoma. The Ceres Project is a beautiful non-profit that teaches teens to cook, and then takes the meals that they prepare and delivers them to cancer patients and their families.  Francesca was a student of mine in culinary school, and graduated with the idea of opening a restaurant.  But after a year of volunteering for Ceres, she decided to open a new branch of the program in her home town of Sonoma.  A brave and selfless move, and one of the reasons I love this lady.
 
Another one of her classmates, Lorrine, volunteers on Tuesdays, too.  When I showed up today she took one look at me and said, quite passionately, "Why aren't you blogging?!"  She told me how she loved reading my blogs and making my recipes.  I was shamed!  I realized that I've been working for other people so much that I've left behind my beloved blog.  So this is for you, Lorrine and Francesca.....
 
My new favorite one-pot meal is Veggie Chickpea Curry.  I was inspired by a recipe I found that included browning chickpeas for a stir fry.  A lot of times it takes just one little thing like that, that I find interesting, and a dish just kind of evolves.
 
 onions, cremini mushrooms, red bell peppers, baby spinach, broccoli, and zucchini
 
 jalapeno, ginger, garlic
 
 
 The key to this dish is getting the chickpeas completely dry.  I popped them in the oven for about 10 minutes to dry them out (I've tested this recipe A LOT and this is the best way to be sure they are dry, and therefore brown appropriately).  Heat a little olive oil in a skillet and add the chickpeas, tossing occasionally until lightly browned.  Removed them from the skillet and add the onion to the skillet. When the onions started to soften, add sliced mushrooms and let them do their thing, too.  "Let them do their thing" means "don't stir them all the time."  I notice in my classes that people loooove to stir.  We think we're not cooking if we're just standing there.  But if you want to get a nice brown on these mushrooms (and you do), you have to let them sit on the heat.  Stir them only occasionally to brown them evenly.  Next, create a little opening in the center of the skillet and add chopped garlic, ginger and jalapeno pepper.


After a few minutes, make another hole and add Madras curry powder (my fave curry) and let that toast for a minute or two to bring out the smoky flavor.  Now we need some color..... sliced red bell pepper, broccoli and zucchini - use whatever veggies you like.  And then we need some yumminess.....coconut milk.


Cover the skillet and let it simmer for 5 minutes, then throw in the chickpeas, a handful of baby spinach and a good pinch of salt.  So pretty, right?  Even more delicious than pretty.  Serve it over brown rice and your taste buds will love you.  OK, technically that makes is a two-pot meal, but.....

Feel free to add any veggies you like. The combo of chickpeas and rice creates a complete protein, but chicken, shrimp or pork are a nice addition if you're needing more.  And why not?

Go ahead, give it a try.  Fast and fabulous....just the way I like it!

Veggie-Chickpea Curry
Serves 4

1 cup short grain brown rice
1 can chickpeas (garbanzo), rinsed and drained
3 tablespoons olive oil, divided
1 cup thinly sliced onion
8 ozs. cremini mushrooms
1 jalapeno pepper, seeded and diced
1 tablespoon minced ginger
2 teaspoons minced garlic
1 tablespoon Madras curry powder
1 15-oz can coconut milk
2 cups broccoli florets, cut into bite-sized pieces
1 zucchini, halved lengthwise and thinly sliced 
1 red bell pepper, thinly sliced
2 cups baby spinach, stems removed
2 tablespoons chopped fresh basil leaves
Sea salt and pepper to taste
  • Preheat oven to 350.
  • Cook brown rice according to package.  Set aside.
  • Place chickpeas on a parchment paper-lined baking sheet and bake for 10 minutes until dry.
  • Heat 1 tablespoon oil in large skillet over medium-high heat and cook chickpeas until lightly browned.  Remove from pan and set aside.
  • Heat remaining 2 tablespoon oil in skillet and add onions and mushrooms. Saute 5-10 minutes until crisp-tender.
  • Move veggies to sides of skillet and create a well.  Add jalapeno pepper, ginger and garlic and cook 1-2 minutes.
  • Mix jalapeno mixture into the veggies, stirring to combine well.
  • Create another well and add curry powder.  Let toast 1 minute and then stir into the rest of the ingredients.
  • Stir in coconut milk.  Add broccoli, zucchini and red bell pepper, stirring to combine.
  • Cover, reduce heat and simmer 5 minutes, until broccoli is crisp-tender.
  • Stir in spinach, basil and chickpeas, tossing until spinach is wilted.
  • Season to taste with salt and pepper and serve over brown rice.
 
Get cookin'......you can thank me later!


Friday, September 20, 2013

Celery Soup....Yes, Celery Soup

I know I say, "You just gotta trust me!" a lot on this blog, and here I go again. 

Celery Soup?  Why on earth would I make celery soup?  Well, I had been making mineral broth for one of my clients, and I had quite a lot of celery left over in my crisper bin.  I chopped it up in salads, added it to salmon burgers, tossed into my stir fry, but I still had so much left over.  I always look at that as an opportunity to do something new.  Why not soup?

I started out by melting butter & olive oil in a pot, then tossed in onion, celery and baby red potatoes. 


After they were good and tender, I added some homemade chicken broth and let it simmer for about 20 minutes.  If you're a vegetarian, you can use vegetable broth, but I have learned that some simple soups, like this one, benefit from the fat that you get from the chicken broth.  Next I pureed the soup in my Vitamix until smooth (the potatoes help give it a creamy texture without the cream), returned it to the pot and added lemon zest, apple cider vinegar and fresh dill.  As always, I hit it with a couple pinches of salt and tentatively took my first taste.  Delicious!  My mom was in town, and was less than thrilled when I told her what I was making for lunch (I'm fully aware that celery soup sounds dull....but turns out, it's not!).  Even she thought it was "divine" and asked if there was enough left over for lunch the next day.  High praise, believe me!
 
So, "trust me!" and give this a try the next time you find yourself with excess celery (or virtually any other veggies for that matter, just pick different herbs to go with what veg you have on hand).


Creamy Celery Soup
Serves 4
 
1 tablespoon olive oil
1 tablespoon unsalted butter
1 cup chopped yellow onion
6 celery stalks, sliced
1/4 lb baby red potatoes, quartered
3 cups chicken broth
1 tablespoon apple cider vinegar
1 tablespoon chopped fresh dill
1 teaspoon lemon zest
1 teaspoon salt
Pinch fresh ground pepper
  • Heat oil and butter in a saucepan over medium high heat.
  • Add onions and sauté for 5 minutes, until softened.
  • Add celery and potatoes and continue cooking, stirring occasionally, for an additional 5 minutes.
  • Add chicken broth, bring to a boil, then reduce heat, cover and simmer 20 minutes.
  • Working in batches, puree soup in blender until smooth.
  • Return soup to pot and add vinegar, dill and zest.
  • Season with salt & pepper.
Yum it up!